Three good weeks of work have resulted in significant progress. Soon after Thanksgiving break I was able to get shingles delivered onto the lower end of the roof. This first required me to power up my chain saw and clear a wide enough route so that the fork lift could make its way back of the addition where the roof is low enough to allow roof-top delivery. Shingling forced me to buy my fifth pneumatic air gun, since renting one for the four-day duration of the actual roofing would be as expensive as buying one. Amazon accommodated with one-day delivery. What an amazing modern world! After the shingles were distributed, the roofing could begin in earnest.
Terry and Jim glue down the final strip of shingles.
Framing of the walls is a piecemeal project since the walls don't carry any significant weight. The horizontal 2x4s are nailing strips to which the vertical pine siding will be attached on the outside and the vertical car siding will be attached on the inside. The finished walls of solid wood eventually create a very strong structure.
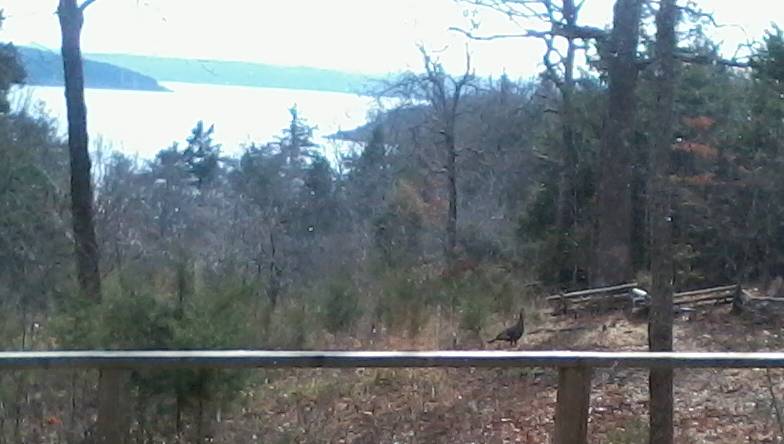
You can see below that I have cleared a bit more of the downhill brush. Notice the turkey posing for the photo just above the deck railing.
Morning walks to the water at this time of year can be very foggy, but it is eerily lovely as the fog rises.
Here we are attaching the very last panel of exterior foam insulation.
The highly reflective addition is starting to look like a house.
Here is another view of the structure. We are starting to get of sense of how the finished building will appear.
This blog records various activities that my wife and I enjoy within one day's drive of our cabin on Lake Norfork in the Arkansas Ozarks. Of course, many of these activities take place right on the lake outside our window, so the earliest entry begins with a little factual information (culled from various web sites) about the lake and its history.
Saturday, December 15, 2012
Monday, November 26, 2012
Thanksgiving
Jim and Terry took a few days off for Thanksgiving and went off to visit family. I slogged away alone--albeit at a relaxed pace. One thing I did was to chop down a bunch of small cedar trees that were blocking the view of the lake. I followed that up by clearing a small trail that should allow Home Depot to deliver shingles onto the low end of the roof. Finally I finished the railing on the new deck and built three sturdy benches from left-over scraps of the 2x12 beams.
Thursday, November 22, 2012
Cabin addition -- 11/22/2012
When I last posted, we had just finished installing the 4x4 crossbeams and the 1x6 pine car siding for the inside ceiling. That was far from being a weather-proof roof, as one long day of heavy rain displayed to my complete satisfaction. Fortunately, I had covered my tools and lumber with black plastic tarps so things survived the storm well.
During the past week or so we have completed a lot of work that isn't particularly visible in snapshots but that is of vital importance. First, we covered the entire roof deck with 1/2" foam panels--shiny side up to insulate the roof and reflect infrared heat from summer sunlight. The foam is held down by 1x4 spacers, spaced at 16" on center. Those in turn hold up the 5/8" OSB roof deck. And now that is covered with 30# felt, with a 19" overlap to provide double coverage. Only the shingles and fascia boards of the finished roof remain to be installed, but even as it is today, the roof should be impervious to the most sustained of rainfalls. . . . And given that the lake is nearing record low water, I very much hope that we get such a rainstorm soon!
![]() |
| Note the 1x4 spacers holding on the layer of foam |
|
Sunday, November 11, 2012
Cabin Building Update--11/11/12
Two weeks ago Jim, Terry, and I had just finished installing the sub-floor, as well as straightening and bracing the main posts. The next task was to install the 2x12 roof beams. In the first picture below, Terry and Jim are lifting the final beam into place while I bend down to retrieve the nail gun. The subsequent picture almost completely hides me as I shoot the nails into the lower end of that beam.
The next several days were spent putting up 4x4 cross beams and then nailing down the first of the car siding that will be exposed as the ceiling of the addition. Most of these tasks go somewhat slowly since each board has to be inspected for cleanliness, and many must be spot sanded or washed. In this kind of construction much of the finish work takes place during stages of construction that would be considered "rough" work in standard construction.
The picture below shows me trimming the square edge around the whole perimeter of the roof. Note the thick coating of saw dust on my jeans and arms.
Finally, the roof has been topped off! Terry is captured in this snapshot admiring the expanse of the roof decking. Even from the top of the roof it is an impressive sight. From below the exposed beams and knotty pine boards are truly beautiful--as least to one who loves the varied appearance of unstained and unpainted wood!
I conclude with a series of snapshots showing the current state of the construction site.
The next several days were spent putting up 4x4 cross beams and then nailing down the first of the car siding that will be exposed as the ceiling of the addition. Most of these tasks go somewhat slowly since each board has to be inspected for cleanliness, and many must be spot sanded or washed. In this kind of construction much of the finish work takes place during stages of construction that would be considered "rough" work in standard construction.
The picture below shows me trimming the square edge around the whole perimeter of the roof. Note the thick coating of saw dust on my jeans and arms.
Finally, the roof has been topped off! Terry is captured in this snapshot admiring the expanse of the roof decking. Even from the top of the roof it is an impressive sight. From below the exposed beams and knotty pine boards are truly beautiful--as least to one who loves the varied appearance of unstained and unpainted wood!
I conclude with a series of snapshots showing the current state of the construction site.
Monday, October 29, 2012
Cabin Building Continues
Trips to New Orleans and Tampa have somewhat slowed the pace of construction, but things are moving ahead steadily. One-inch foam panels were cut to fit between the floor joists and are supported by furring strips. This insulation should make the floor cozy in the winter months.
The subfloor is 3/4" tongue-in-groove Advantech 4x8 plywood. This product is supposed to be able to shed water for 90 days or so--giving builders time to get the roof up before moisture damage can occur. The pictures show Terry and me standing about idly while Jim is down on his knees trying to figure out a problem in making the last few pieces of plywood fit. (Really and truly, Terry and I are not always so idle!)
The next two snapshots show the current state of the project. Look closely and you can see the temporary cleats (or blocks) near the top of the posts. Today's work will have us lifting 2x12 beams to rest on those blocks. We will glue, nail, and bolt them to the posts.
Note the various cross braces in the snapshot below. No matter how hard one tries, it is impossible to get the posts perfectly vertical as they are lifted and cemented into the foundation holes. The bracing brings them into better position and will stay in place until the 4x4 cross beams firm up the entire frame.
One of my biggest nightmares in the planning of this addition has been calculating the exact height at which the beams should attach to each post. The new roof must wedge under the roof on the old part of the cabin with at least ten inches of clearance (to allow hammering, etc.). The ceiling in the lowest part of the new addition should be adequate (about 90" or more). The pass-through from the new addition to the bathroom in the old cabin has about a 5" step up and the must pass right beneath the lowest part of a major beam; head clearance of about 78" is required. Some of these specifications conflict with one another in vexing ways. Indeed, it was almost impossible to find a way to have enough head room in the passthrough to the bath. Eventually I decided to add several sub-posts along the east wall, allowing me to cut the main beam from 2x12 down to 2x6.
The little sketch below was an early attempt to check my calculations of roof slope. It barely hints at the hours of measuring, calculating, and remeasuring that I have done. On one sad day (just before 5 PM--exactly the wrong time to make a major decision) I cut two of the center posts off too short. Initially it appeared that I would have only 1 1/2" of exposed post on which to attach my main support beams! Not good! I spent a whole day cutting big dadoes and biscuits so that I could lengthen those two posts. After much additional calculation I found that the beams would actually attach enough lower on the posts to allow my bolts to run through firm wood, but the extensions are still helpful.
The subfloor is 3/4" tongue-in-groove Advantech 4x8 plywood. This product is supposed to be able to shed water for 90 days or so--giving builders time to get the roof up before moisture damage can occur. The pictures show Terry and me standing about idly while Jim is down on his knees trying to figure out a problem in making the last few pieces of plywood fit. (Really and truly, Terry and I are not always so idle!)
The next two snapshots show the current state of the project. Look closely and you can see the temporary cleats (or blocks) near the top of the posts. Today's work will have us lifting 2x12 beams to rest on those blocks. We will glue, nail, and bolt them to the posts.
Note the various cross braces in the snapshot below. No matter how hard one tries, it is impossible to get the posts perfectly vertical as they are lifted and cemented into the foundation holes. The bracing brings them into better position and will stay in place until the 4x4 cross beams firm up the entire frame.
One of my biggest nightmares in the planning of this addition has been calculating the exact height at which the beams should attach to each post. The new roof must wedge under the roof on the old part of the cabin with at least ten inches of clearance (to allow hammering, etc.). The ceiling in the lowest part of the new addition should be adequate (about 90" or more). The pass-through from the new addition to the bathroom in the old cabin has about a 5" step up and the must pass right beneath the lowest part of a major beam; head clearance of about 78" is required. Some of these specifications conflict with one another in vexing ways. Indeed, it was almost impossible to find a way to have enough head room in the passthrough to the bath. Eventually I decided to add several sub-posts along the east wall, allowing me to cut the main beam from 2x12 down to 2x6.
The little sketch below was an early attempt to check my calculations of roof slope. It barely hints at the hours of measuring, calculating, and remeasuring that I have done. On one sad day (just before 5 PM--exactly the wrong time to make a major decision) I cut two of the center posts off too short. Initially it appeared that I would have only 1 1/2" of exposed post on which to attach my main support beams! Not good! I spent a whole day cutting big dadoes and biscuits so that I could lengthen those two posts. After much additional calculation I found that the beams would actually attach enough lower on the posts to allow my bolts to run through firm wood, but the extensions are still helpful.
Subscribe to:
Posts (Atom)