After four more weeks of work--made intermittent by Christmas celebrations and the inevitable winter weather--we have finished the siding and begun work on the interior.
This blog records various activities that my wife and I enjoy within one day's drive of our cabin on Lake Norfork in the Arkansas Ozarks. Of course, many of these activities take place right on the lake outside our window, so the earliest entry begins with a little factual information (culled from various web sites) about the lake and its history.
Showing posts with label Cabin building. Show all posts
Wednesday, January 23, 2013
Saturday, December 15, 2012
Three More Work Weeks
Three good weeks of work have resulted in significant progress. Soon after Thanksgiving break I was able to get shingles delivered onto the lower end of the roof. This first required me to power up my chain saw and clear a wide enough route so that the fork lift could make its way back of the addition where the roof is low enough to allow roof-top delivery. Shingling forced me to buy my fifth pneumatic air gun, since renting one for the four-day duration of the actual roofing would be as expensive as buying one. Amazon accommodated with one-day delivery. What an amazing modern world! After the shingles were distributed, the roofing could begin in earnest.
Terry and Jim glue down the final strip of shingles.
Framing of the walls is a piecemeal project since the walls don't carry any significant weight. The horizontal 2x4s are nailing strips to which the vertical pine siding will be attached on the outside and the vertical car siding will be attached on the inside. The finished walls of solid wood eventually create a very strong structure.
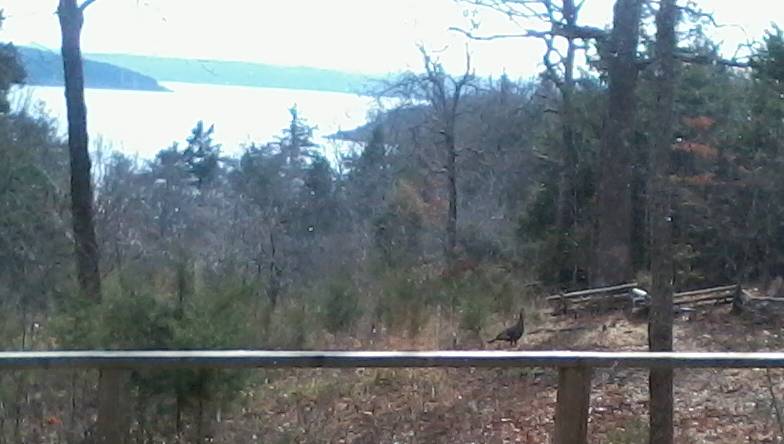
You can see below that I have cleared a bit more of the downhill brush. Notice the turkey posing for the photo just above the deck railing.
Morning walks to the water at this time of year can be very foggy, but it is eerily lovely as the fog rises.
Here we are attaching the very last panel of exterior foam insulation.
The highly reflective addition is starting to look like a house.
Here is another view of the structure. We are starting to get of sense of how the finished building will appear.
Terry and Jim glue down the final strip of shingles.
Framing of the walls is a piecemeal project since the walls don't carry any significant weight. The horizontal 2x4s are nailing strips to which the vertical pine siding will be attached on the outside and the vertical car siding will be attached on the inside. The finished walls of solid wood eventually create a very strong structure.
You can see below that I have cleared a bit more of the downhill brush. Notice the turkey posing for the photo just above the deck railing.
Morning walks to the water at this time of year can be very foggy, but it is eerily lovely as the fog rises.
Here we are attaching the very last panel of exterior foam insulation.
The highly reflective addition is starting to look like a house.
Here is another view of the structure. We are starting to get of sense of how the finished building will appear.
Monday, November 26, 2012
Thanksgiving
Jim and Terry took a few days off for Thanksgiving and went off to visit family. I slogged away alone--albeit at a relaxed pace. One thing I did was to chop down a bunch of small cedar trees that were blocking the view of the lake. I followed that up by clearing a small trail that should allow Home Depot to deliver shingles onto the low end of the roof. Finally I finished the railing on the new deck and built three sturdy benches from left-over scraps of the 2x12 beams.
Thursday, November 22, 2012
Cabin addition -- 11/22/2012
When I last posted, we had just finished installing the 4x4 crossbeams and the 1x6 pine car siding for the inside ceiling. That was far from being a weather-proof roof, as one long day of heavy rain displayed to my complete satisfaction. Fortunately, I had covered my tools and lumber with black plastic tarps so things survived the storm well.
During the past week or so we have completed a lot of work that isn't particularly visible in snapshots but that is of vital importance. First, we covered the entire roof deck with 1/2" foam panels--shiny side up to insulate the roof and reflect infrared heat from summer sunlight. The foam is held down by 1x4 spacers, spaced at 16" on center. Those in turn hold up the 5/8" OSB roof deck. And now that is covered with 30# felt, with a 19" overlap to provide double coverage. Only the shingles and fascia boards of the finished roof remain to be installed, but even as it is today, the roof should be impervious to the most sustained of rainfalls. . . . And given that the lake is nearing record low water, I very much hope that we get such a rainstorm soon!
![]() |
| Note the 1x4 spacers holding on the layer of foam |
|
Sunday, November 11, 2012
Cabin Building Update--11/11/12
Two weeks ago Jim, Terry, and I had just finished installing the sub-floor, as well as straightening and bracing the main posts. The next task was to install the 2x12 roof beams. In the first picture below, Terry and Jim are lifting the final beam into place while I bend down to retrieve the nail gun. The subsequent picture almost completely hides me as I shoot the nails into the lower end of that beam.
The next several days were spent putting up 4x4 cross beams and then nailing down the first of the car siding that will be exposed as the ceiling of the addition. Most of these tasks go somewhat slowly since each board has to be inspected for cleanliness, and many must be spot sanded or washed. In this kind of construction much of the finish work takes place during stages of construction that would be considered "rough" work in standard construction.
The picture below shows me trimming the square edge around the whole perimeter of the roof. Note the thick coating of saw dust on my jeans and arms.
Finally, the roof has been topped off! Terry is captured in this snapshot admiring the expanse of the roof decking. Even from the top of the roof it is an impressive sight. From below the exposed beams and knotty pine boards are truly beautiful--as least to one who loves the varied appearance of unstained and unpainted wood!
I conclude with a series of snapshots showing the current state of the construction site.
The next several days were spent putting up 4x4 cross beams and then nailing down the first of the car siding that will be exposed as the ceiling of the addition. Most of these tasks go somewhat slowly since each board has to be inspected for cleanliness, and many must be spot sanded or washed. In this kind of construction much of the finish work takes place during stages of construction that would be considered "rough" work in standard construction.
The picture below shows me trimming the square edge around the whole perimeter of the roof. Note the thick coating of saw dust on my jeans and arms.
Finally, the roof has been topped off! Terry is captured in this snapshot admiring the expanse of the roof decking. Even from the top of the roof it is an impressive sight. From below the exposed beams and knotty pine boards are truly beautiful--as least to one who loves the varied appearance of unstained and unpainted wood!
I conclude with a series of snapshots showing the current state of the construction site.
Monday, October 29, 2012
Cabin Building Continues
Trips to New Orleans and Tampa have somewhat slowed the pace of construction, but things are moving ahead steadily. One-inch foam panels were cut to fit between the floor joists and are supported by furring strips. This insulation should make the floor cozy in the winter months.
The subfloor is 3/4" tongue-in-groove Advantech 4x8 plywood. This product is supposed to be able to shed water for 90 days or so--giving builders time to get the roof up before moisture damage can occur. The pictures show Terry and me standing about idly while Jim is down on his knees trying to figure out a problem in making the last few pieces of plywood fit. (Really and truly, Terry and I are not always so idle!)
The next two snapshots show the current state of the project. Look closely and you can see the temporary cleats (or blocks) near the top of the posts. Today's work will have us lifting 2x12 beams to rest on those blocks. We will glue, nail, and bolt them to the posts.
Note the various cross braces in the snapshot below. No matter how hard one tries, it is impossible to get the posts perfectly vertical as they are lifted and cemented into the foundation holes. The bracing brings them into better position and will stay in place until the 4x4 cross beams firm up the entire frame.
One of my biggest nightmares in the planning of this addition has been calculating the exact height at which the beams should attach to each post. The new roof must wedge under the roof on the old part of the cabin with at least ten inches of clearance (to allow hammering, etc.). The ceiling in the lowest part of the new addition should be adequate (about 90" or more). The pass-through from the new addition to the bathroom in the old cabin has about a 5" step up and the must pass right beneath the lowest part of a major beam; head clearance of about 78" is required. Some of these specifications conflict with one another in vexing ways. Indeed, it was almost impossible to find a way to have enough head room in the passthrough to the bath. Eventually I decided to add several sub-posts along the east wall, allowing me to cut the main beam from 2x12 down to 2x6.
The little sketch below was an early attempt to check my calculations of roof slope. It barely hints at the hours of measuring, calculating, and remeasuring that I have done. On one sad day (just before 5 PM--exactly the wrong time to make a major decision) I cut two of the center posts off too short. Initially it appeared that I would have only 1 1/2" of exposed post on which to attach my main support beams! Not good! I spent a whole day cutting big dadoes and biscuits so that I could lengthen those two posts. After much additional calculation I found that the beams would actually attach enough lower on the posts to allow my bolts to run through firm wood, but the extensions are still helpful.
The subfloor is 3/4" tongue-in-groove Advantech 4x8 plywood. This product is supposed to be able to shed water for 90 days or so--giving builders time to get the roof up before moisture damage can occur. The pictures show Terry and me standing about idly while Jim is down on his knees trying to figure out a problem in making the last few pieces of plywood fit. (Really and truly, Terry and I are not always so idle!)
The next two snapshots show the current state of the project. Look closely and you can see the temporary cleats (or blocks) near the top of the posts. Today's work will have us lifting 2x12 beams to rest on those blocks. We will glue, nail, and bolt them to the posts.
Note the various cross braces in the snapshot below. No matter how hard one tries, it is impossible to get the posts perfectly vertical as they are lifted and cemented into the foundation holes. The bracing brings them into better position and will stay in place until the 4x4 cross beams firm up the entire frame.
One of my biggest nightmares in the planning of this addition has been calculating the exact height at which the beams should attach to each post. The new roof must wedge under the roof on the old part of the cabin with at least ten inches of clearance (to allow hammering, etc.). The ceiling in the lowest part of the new addition should be adequate (about 90" or more). The pass-through from the new addition to the bathroom in the old cabin has about a 5" step up and the must pass right beneath the lowest part of a major beam; head clearance of about 78" is required. Some of these specifications conflict with one another in vexing ways. Indeed, it was almost impossible to find a way to have enough head room in the passthrough to the bath. Eventually I decided to add several sub-posts along the east wall, allowing me to cut the main beam from 2x12 down to 2x6.
The little sketch below was an early attempt to check my calculations of roof slope. It barely hints at the hours of measuring, calculating, and remeasuring that I have done. On one sad day (just before 5 PM--exactly the wrong time to make a major decision) I cut two of the center posts off too short. Initially it appeared that I would have only 1 1/2" of exposed post on which to attach my main support beams! Not good! I spent a whole day cutting big dadoes and biscuits so that I could lengthen those two posts. After much additional calculation I found that the beams would actually attach enough lower on the posts to allow my bolts to run through firm wood, but the extensions are still helpful.
Wednesday, October 17, 2012
Cabin Buiding -- part 2
![]() |
| Revised Addition Plan |
A lot has changed in the month since my last post about the cabin construction project. Most notably I spent hours staring under the current cabin and finding myself absolutely unable to figure out how to hook a new bathroom into our current septic system. Finally I spend a few more hours whining about my problems to Sue before I was able to convince her to let me redraw the plans. The new plan has us expanding and remodeling one of the bathrooms in the current cabin and limiting the addition to having a mini-kitchen. Removing the third bathroom makes the floor plan for the addition considerably more spacious.
Even before settling on a final floor plan, I was able to press ahead with digging post holes. Unfortunately, several tree stumps got in the way so I hired my friend Matt Foster to send Reese over with a back hoe to dig out the stumps. While he was there, I was persuaded to have him dig all the post holes as well. That turned out to be a very mixed blessing. A back hoe does the job quickly and powerfully, but it leaves one with post holes that are far too big. That forced me to build plywood forms for the concrete (a time-consuming job) and then to spend about as much back-breaking time filling the holes as I would have spent digging them in the first place. Fortunately, I have been able to recruit my friends Terry and Jim to help.
The first load of lumber was delivered on September 24.

Shortly afterward the three of us were hard at work . . . if you can call it working when Terry and I are joking and laughing while Jim sweats away mixing cement.

A few days later we had tipped all the posts into the holes, filled the forms with concrete, and attached bracing to keep everything standing while the concrete dried.

More days passed in the joy of refilling the holes with rocks and dirt, and then beginning the task of putting up beams and joists. By October 3rd something like a cabin addition was starting to emerge.

The construction site in our remote extremity of the Ozarks is very peaceful. Few visitors stop to admire our work, but in these final two snapshots you see two who did take the time to come by.
The eagle settled into a tree about fifty feet from the deck and spent most of a morning observing the surrounding terrain.

The tarantula was just passing through and barely seemed to notice or care what we were doing.
Saturday, September 15, 2012
The Cabin Addition--First Steps
My cabin has grown in stages. First I built the tiny 400-square-foot cabin of 1988. I was an English professor with no experience at construction and I wanted to see if my small post-and-beam structure would stand up-- and keep out the wind and the cold. At that time there was no way to get electricity to the site so it made little sense to build a grand mansion. I was working with the most basic tools and had only a small generator to provide a bit of electricity.
In 1998 it became possible for us to get a power line so I decided to add on another 740 square feet, giving us a quite livable cabin with three small bedrooms, two bathrooms, a nice kitchen, and a rather large great room for everything else. Not long after that I built a separate two-car garage. When Sue and I moved here after I retired from college teaching, we began to feel the need for a little more space for the comfort and privacy of our occasional guests.
My initial plan had been to add on to our cabin last winter, and it would have been a perfect year to do so since we had splendid, mild building weather with little rain all winter long. But my fractured clavicle scotched that notion. By the time I had finally begun to heal, it was early summer and a series of 100-degree days made post-hole digging a very unattractive recreation.
Now that fall is here, building is once more possible, but I am feeling somewhat older. Last fall I had drawn up plans for a two-story addition, adding 1200 square feet to the 1140 of the current cabin. The older, creakier, and wiser Jeff finds himself daunted by the thought of rising like Daedalus so far toward the Sun. Sue and I have now settled on a well-grounded one-story plan that still meets all of our needs.

Here is a sketch of the floor plan--a great room, two small bedrooms, a bathroom, a mini-kitchen, and ample storage space.

Floor plan in hand, I fired up the chain saw and laid waste to a bit of woods on the west side of the cabin.
In my previous bouts of building (1988 and 1998), I used basic hand tools, a circular saw, a power drill, and a saber saw. But as you can see from this picture of me hanging out in the cabin, the floors, the ceiling, and all of the walls are built with tongue-in-groove pine 1x6" boards. That creates a beautiful, solid building . . . but there are lots and lots of nails to drive!
So I put in a order at Amazon for a compressor and four nail guns. The biggest gun shoots nails up to 3 1/2 inches long and gives one a good jolt with its recoil. It will be very helpful when installing the bigger framing pieces. The bulk of the work, however, will fall to the 2 1/2" finishing nailer. It sinks its nails so smoothly and gently that the first few times I tried it I wasn't even sure it was working.
Sadly, one of the post holes must sink into the ground almost exactly where there is the stump of a rather large ash tree. I spent the better part of two days trying to dig out that stump. I managed to expose and slice through all of the large lateral roots. Then I hooked a tow strap to the stump and attempted to pull it out with the Jeep. No go. Extracting it is about as painful as trying to jerk out a wisdom tooth with a pair of pliers. I'll have to get my friend Matt to come over with his backhoe and dig out that stump and a few others. Still, the building site is already pretty clear. I have been able to mark the location of the main post holes. One is probably already dug--15 inches deep to solid rock.

Digging post holes in the rocky Ozark plateau is not like digging in any normal soil. I use a five-foot-long, 20-pound steel wrecking bar to batter an inch or so into the rocky carapace. Then I scoop out the shattered dust and repeat. Inch-by-inch. If I get lucky, I can sometimes push a hole down below the frost line before hitting any really huge rocks. When luck fails, I have to use the wrecking bar to work my way around the rocks, completely exposing them. And then I pry them out of the ground. It is slow work, made slower by the need to accustom my body gradually to its new forms of exercise.
In 1998 it became possible for us to get a power line so I decided to add on another 740 square feet, giving us a quite livable cabin with three small bedrooms, two bathrooms, a nice kitchen, and a rather large great room for everything else. Not long after that I built a separate two-car garage. When Sue and I moved here after I retired from college teaching, we began to feel the need for a little more space for the comfort and privacy of our occasional guests.
My initial plan had been to add on to our cabin last winter, and it would have been a perfect year to do so since we had splendid, mild building weather with little rain all winter long. But my fractured clavicle scotched that notion. By the time I had finally begun to heal, it was early summer and a series of 100-degree days made post-hole digging a very unattractive recreation.
Now that fall is here, building is once more possible, but I am feeling somewhat older. Last fall I had drawn up plans for a two-story addition, adding 1200 square feet to the 1140 of the current cabin. The older, creakier, and wiser Jeff finds himself daunted by the thought of rising like Daedalus so far toward the Sun. Sue and I have now settled on a well-grounded one-story plan that still meets all of our needs.

Here is a sketch of the floor plan--a great room, two small bedrooms, a bathroom, a mini-kitchen, and ample storage space.

Floor plan in hand, I fired up the chain saw and laid waste to a bit of woods on the west side of the cabin.
In my previous bouts of building (1988 and 1998), I used basic hand tools, a circular saw, a power drill, and a saber saw. But as you can see from this picture of me hanging out in the cabin, the floors, the ceiling, and all of the walls are built with tongue-in-groove pine 1x6" boards. That creates a beautiful, solid building . . . but there are lots and lots of nails to drive!
So I put in a order at Amazon for a compressor and four nail guns. The biggest gun shoots nails up to 3 1/2 inches long and gives one a good jolt with its recoil. It will be very helpful when installing the bigger framing pieces. The bulk of the work, however, will fall to the 2 1/2" finishing nailer. It sinks its nails so smoothly and gently that the first few times I tried it I wasn't even sure it was working.
Sadly, one of the post holes must sink into the ground almost exactly where there is the stump of a rather large ash tree. I spent the better part of two days trying to dig out that stump. I managed to expose and slice through all of the large lateral roots. Then I hooked a tow strap to the stump and attempted to pull it out with the Jeep. No go. Extracting it is about as painful as trying to jerk out a wisdom tooth with a pair of pliers. I'll have to get my friend Matt to come over with his backhoe and dig out that stump and a few others. Still, the building site is already pretty clear. I have been able to mark the location of the main post holes. One is probably already dug--15 inches deep to solid rock.

Digging post holes in the rocky Ozark plateau is not like digging in any normal soil. I use a five-foot-long, 20-pound steel wrecking bar to batter an inch or so into the rocky carapace. Then I scoop out the shattered dust and repeat. Inch-by-inch. If I get lucky, I can sometimes push a hole down below the frost line before hitting any really huge rocks. When luck fails, I have to use the wrecking bar to work my way around the rocks, completely exposing them. And then I pry them out of the ground. It is slow work, made slower by the need to accustom my body gradually to its new forms of exercise.
Friday, November 19, 2010
Roof Repair
Last week I was blowing leaves and twigs off the cabin roof when I noticed a decidedly spongy spot in the plywood decking. This was no surprise. In steady rains the cabin has leaked in that general area (fortunately in the entry to the great room) for much of the past decade. On numerous occasions I had climbed around on the roof, inspecting everything imaginable and searching for the mysterious source of the leak. I could never find it.
So the good news was that the source of the leak could now be pinned down to above and slightly upslope of the spongy decking. I made a trip to town for a couple of packs of shingles and this week I set about the repair. For starters I had to remove all the shingles above the rotten section until I worked my way out to sound wood on all sides. This is trickier than removing an old roof prior to a general reshingling because one must be vigilant not to poke holes in the surrounding shingles. In the best case I would have had to patch only a small section of plywood--perhaps 3 feet by 3 feet--but as it happened, I ended up with about 8 feet by 8 feet ripped away as shown in the picture below.

Of course, this didn't line up perfectly with the support beams beneath, nor was the exposed area perfectly square. And not much to my surprise, a couple of the support beams themselves were past saving. After a couple of afternoons of work, I had created a pretty respectable hole in my roof.
Following another trip to town for a roll of 30 lb felt, I began creating a grid of new beams for the patch. Then I pieced in plywood decking (which was free because I had salvaged it from last winter's siding repairs on the Jonesboro house). I discovered it was a tricky job to slide in roofing felt so that the retained shingles properly overlaid the felt. Then it was just a matter of nailing on the new shingles--a job that inevitably involves a good bit of sanding of one's kneecaps and knuckles on the coarse surface of the shingles.
So now I have a nicely patched roof. The original cause of all the trouble was a single roofing nail that had gradually worked its way loose and incrementally poked a well-concealed hole in the shingles above it. I know that I've eliminated that particular source of leakage, but I won't find out whether the new patch is successful at shedding water until we get a long, soaking rainstorm. But I do know that even if one starts a roof repair in the midst of one of the longest droughts in years--and the forecast shows no rain in the days to come--you can be guaranteed at least some precipitation as soon as you cut a big hole in your roof. For two mornings Sue and I made use of every bucket and pan in the house to capture what we could of unpredicted fall drizzles.
So the good news was that the source of the leak could now be pinned down to above and slightly upslope of the spongy decking. I made a trip to town for a couple of packs of shingles and this week I set about the repair. For starters I had to remove all the shingles above the rotten section until I worked my way out to sound wood on all sides. This is trickier than removing an old roof prior to a general reshingling because one must be vigilant not to poke holes in the surrounding shingles. In the best case I would have had to patch only a small section of plywood--perhaps 3 feet by 3 feet--but as it happened, I ended up with about 8 feet by 8 feet ripped away as shown in the picture below.

Of course, this didn't line up perfectly with the support beams beneath, nor was the exposed area perfectly square. And not much to my surprise, a couple of the support beams themselves were past saving. After a couple of afternoons of work, I had created a pretty respectable hole in my roof.
Following another trip to town for a roll of 30 lb felt, I began creating a grid of new beams for the patch. Then I pieced in plywood decking (which was free because I had salvaged it from last winter's siding repairs on the Jonesboro house). I discovered it was a tricky job to slide in roofing felt so that the retained shingles properly overlaid the felt. Then it was just a matter of nailing on the new shingles--a job that inevitably involves a good bit of sanding of one's kneecaps and knuckles on the coarse surface of the shingles.
So now I have a nicely patched roof. The original cause of all the trouble was a single roofing nail that had gradually worked its way loose and incrementally poked a well-concealed hole in the shingles above it. I know that I've eliminated that particular source of leakage, but I won't find out whether the new patch is successful at shedding water until we get a long, soaking rainstorm. But I do know that even if one starts a roof repair in the midst of one of the longest droughts in years--and the forecast shows no rain in the days to come--you can be guaranteed at least some precipitation as soon as you cut a big hole in your roof. For two mornings Sue and I made use of every bucket and pan in the house to capture what we could of unpredicted fall drizzles.
Sunday, May 10, 2009
DIY Home-Building
I have a theory that do-it-yourself home-builders are satisfied with smaller homes than other home-owners.
If you create the foundation, do the plumbing, wire the circuits, cut all the boards, pound all the nails, set all the windows, mount all the doors, and lay all the shingles, you just get too tired to build a mansion. My own tiny cabin is a mere 1140 square feet, and I had some help. The people I have known who do everything for themselves are generally satisfied with something even smaller.
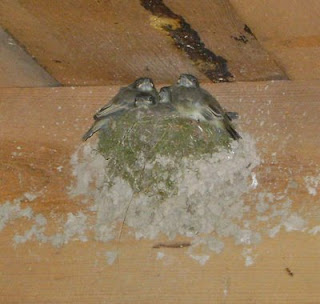
This general hypothesis is well-illustrated by the family of house wrens that has built an abode in my wood shed. As you can see from the picture below, the loving songbirds did not wholly plan for quadruplets.
If you create the foundation, do the plumbing, wire the circuits, cut all the boards, pound all the nails, set all the windows, mount all the doors, and lay all the shingles, you just get too tired to build a mansion. My own tiny cabin is a mere 1140 square feet, and I had some help. The people I have known who do everything for themselves are generally satisfied with something even smaller.
This general hypothesis is well-illustrated by the family of house wrens that has built an abode in my wood shed. As you can see from the picture below, the loving songbirds did not wholly plan for quadruplets.
Subscribe to:
Posts (Atom)