Tuesday, October 6, 2015

Building a Chesapeake Light Craft Northeaster Dory - Day 5

Last night I told Sue that she would soon have to join me as a boat builder for a day or two. She was eager to start! (The alternative was that she would have to work toward her goal of riding 100 miles a week on her bike.) So in the morning while she went to town, I sanded the thwarts and cleaned up all rabbets and splotches on the hull panels. Then I cleaned off the flatbed trailer and dragged it outside to make room in the garage for the two saw horses that will hold the boat during the rest of the construction.

We got down to work in mid-afternoon and started to wire on the first hull panels and the bulkheads. It was a touchy and somewhat challenging business -- especially the final task of fitting in the transom. But now it is starting to look like a boat. By tomorrow afternoon it should start looking like a Northeaster Dory.


Monday, October 5, 2015

Building a Chesapeake Light Craft Northeaster Dory -- Day 4

This morning I spent a couple of hours cleaning up the hull panels I glued yesterday and then preparing for the afternoon by attaching rails to the flatbed so that I could later glue and clamp the thwarts.

After lunch it took another couple of hours to glue and clamp the 4th hull panel as well as the thwarts.


We're now ready to begin assembling the hull whenever Sue and I find a few hours that we can both devote to the task. First, though, I have to at least trace onto cardboard the outlines of the bulkheads so that it is later easier to cut the exact shapes of the foam flotation blocks that will be glued under the thwarts.

And while I await Sue's leisure, I still have a number of other steps I can usefully complete -- gluing the rails, the spars, the rudder, and the daggerboard, as well as beginning to shape the mast.

Sunday, October 4, 2015

Building a Chesapeake Light Craft Northeaster Dory -- Day 3

Surprisingly about half of my boat-building time has been spent getting ready to work on the boat -- unpacking parts, moving things around, preparing the flatbed trailer, finding plastic, cutting clamps, etc. 

The first hull panels glued together nicely. This morning I removed the clamps and used the new orbital sander to sand the joints smooth. It came close to using up one piece of 80-grit sandpaper so I am definitely going to want some 10-sheet or 20-sheet packets. Then I had to prepare a cardboard covered place on the floor big enough to store the panels for a couple of days. After that I set up panels 2 and 3 for gluing, as well as the mast. 


Tomorrow I will still have to glue panel 4 and I can certainly do the thwarts and perhaps the spars and the rails. I think that’s all the use I’ll have for the flatbed trailer. By Tuesday or Wednesday, I’ll be ready to wire together the hull

Saturday, October 3, 2015

Building a Chesapeake Light Craft Northeaster Dory -- Day 2

Last spring I finally got motivated to fix some relatively minor (but long term) leaks in the roof of the garage and one section of the cabin. This required me to tear off a bunch of shingles, pry up and replace some significant areas of rotten plywood decking, and then re-shingle it all. I saved the old plywood because, while parts of it were rotten, larger parts of it might still be useful in other projects.

Today I put that decking to use in building my boat. My task today was to begin gluing together the Dory's hull panels. These Okoume panels are cut from 4 x 8 sheets of plywood and then glued together to lengths of almost 18' in the case of the Northeaster Dory. The best way to glue them together is to lay them out on a large plywood table. I have an old flatbed trailer with spaced 2 x 4s that I use for hauling firewood. It was easy enough to take the relatively solid parts of the old roof decking and screw them down onto the trailer. This gave me my "table" and allowed me to clamp the joints in the Okoume panels by putting a piece of 1" lumber across each joint and screwing it down to the "table." In this way I was able to lay up the hull's bottom and its first row of "lapstrake boards."
Tomorrow I hope to glue together the rest of the lapstrake panels and perhaps also the thwarts, the spars, and/or the mast.


Friday, October 2, 2015

Building a Chesapeake Light Craft Northeaster Dory -- Day 1

Yesterday the five boxes containing the parts for our Northeaster Dory finally arrived in a big Ryder truck. It was a long wait since the kit did not ship immediately from the company, and then along the way one of the shipping companies handling the boxes went out of business. For a couple of anxious days the boat seemed to have been lost at land (rather than lost at sea) in Little Rock. But eventually things got sorted out, and the boxes arrived in reasonably good condition.

I spent the afternoon unpacking the boxes, somewhat daunted by the number and variety of parts.

Most of this is additional supplies -- not part of the kit


Perhaps the most valuable thing in the entire shipment is the 179 page instruction book -- which is included as part of the kit but is a real bargain for more adventurous builders at only $99 (along with full sized plans). I spent the evening reading the book and then the morning rereading it.


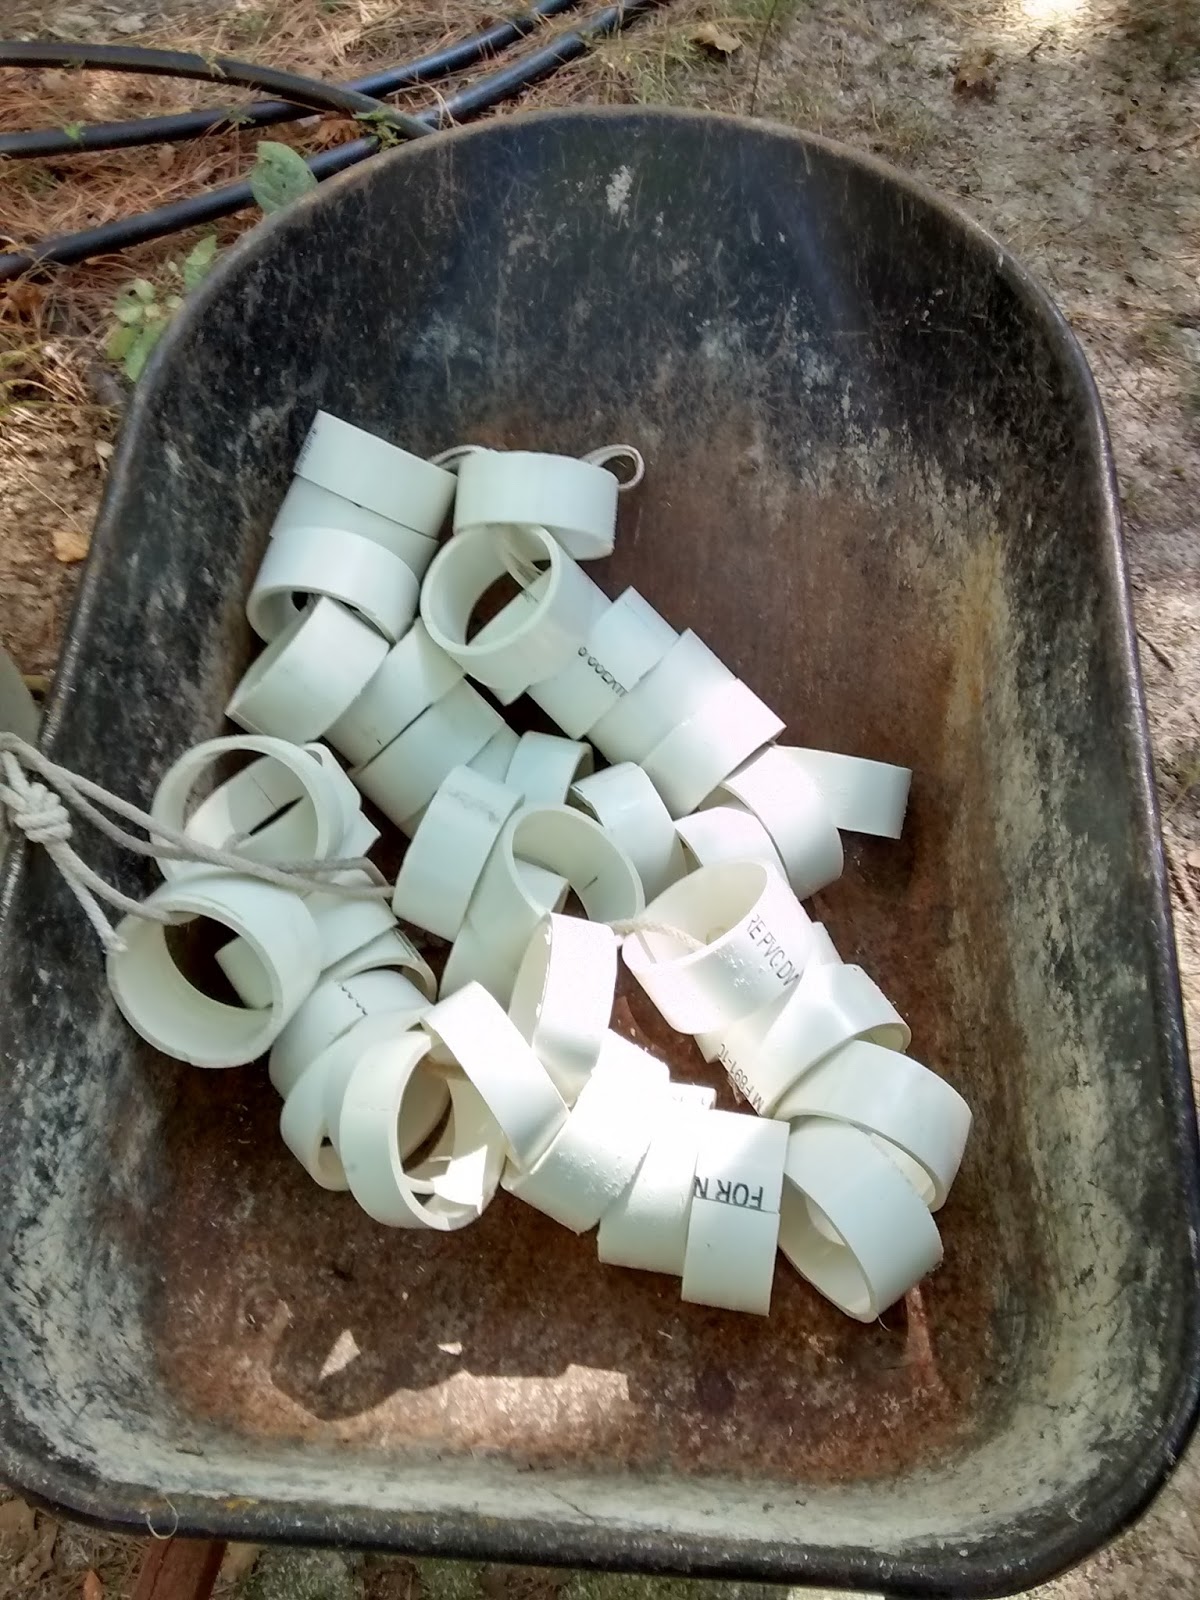
This afternoon I got down to work. First I cut about 30 clamps from 4" PVC pipe based on a construction tip from the Chesapeake Light Craft web site.


I actually should have cut an additional 30 clamps since I could have used a few more in gluing up the bulkheads pictured below. The biggest problem in the task (as was pointed out in the instruction book) is that the pieces tend to slide around as glue is squeezed out by the clamps, necessitating some finicky efforts to align them again. I wasn't able to align them all perfectly, but I do think they will be good enough.


All in all I think it was a successful first day of Dory building, but I'll know more when I examine the bulkheads after they have dried.